Tuesday, March 30, 2010

Daring Bakers' March Challenge - Orange Tian


The 2010 March Daring Baker’s challenge was hosted by Jennifer of Chocolate Shavings. She chose Orange Tian as the challenge for this month, a dessert based on a recipe from Alain Ducasse’s Cooking School in Paris.


*rush rush rush rush rush* Whew!

Obviously, I am very, very late for this month’s Daring Bakers’ Challenge, and I apologize for that. It’s been very stressful and busy lately, and I just couldn’t put the time aside. Still, it’s the first time I’ve ever been late, with 11 challenges under my belt… so it’s not a terrible track record yet.

I wasn’t familiar at all with Orange Tian. Whenever I mentioned tian to anyone, they associated it with vegetables. But what we were challenged to make by Jennifer, our hostess, was a layered dessert consisting of pâte sablée, citrus marmalade, stabilized whipped cream, and caramel-infused citrus segments.

I had made pâte sablée before, and it was as forgiving and delicious as I remember. It’s a very rich pastry dough that could practically be eaten as a cookie, thanks to its crumbly texture. It goes great with fruity concoctions.


We were free to use any kind of citrus for this challenge. I initially wanted to use blood oranges, but my grocery store was out of them, so I stuck with plain old oranges. The first step was to make marmalade. Now, I’m not much of a jam-maker: I just don’t like cooking fruit, I prefer to eat them fresh. But every now and then, it’s a fun process to go through. I slightly overcooked my marmalade, but it was good enough to serve its purpose.

It had been a long time since I had last made caramel. I think it’s always going to be scary: the hissing and spattering when you pour the liquid over the boiling sugar always makes me feel a little overwhelmed. But I’m getting used to it.

I had never segmented an orange before, because I just don’t use oranges much in my cooking and baking. And when I do, I only use the zest and the juice. Properly skinning and cutting out the segments took some practice, and was a lengthy process. After two oranges, I was ready to throw down my sticky fruit knife. But by the sixth and final one, I was actually starting to enjoy it.


Finally, I’m very happy to have learned how to make stabilized whipped cream, because I can think of so many applications for it. It’s basically just whipped cream with gelatin, but it does hold so much better and longer than the regular kind.

I used deep baking rings to assemble four little tians. They were a bit too large for one person, but perfect for sharing. We were instructed to freeze the tians for ten minutes, but I made them ahead and froze them for a few hours, thawing them 30 minutes before serving, to give me time to take pictures.

They were still a little frozen when we dug into them, but it wasn’t a bad thing: the cream tasted a little like frozen yogurt. I did like the orange tian, but if I make this again, I would definitely try more complex flavours. However, I do love the concept, and I want to thank Jennifer for introducing us to it. It's a very good-looking, fresh-tasting dessert that is sure to make an impression on guests!


So, um, better late than never?

Sunday, March 21, 2010

(Re)discovering a classic - Peanut Butter Cookies


Would you believe that, until recently, I had never baked with peanut butter? Not once. Peanut butter is a regular feature in my sandwiches, and it goes a long way in Thai peanut sauce. But, even though I frequently found myself drooling over recipes and blog posts about peanut butter brownies, cookies, and cakes, I just never got around to trying them.

So the January Daring Bakers’ Challenge was actually the first time peanut butter found its way into one of my sweet treats – this time, in the form of the filling for the challenge Nanaimo bars (which I’m told I should make again).

Perhaps this pulled a mental trigger, but when I was hit with a sudden urge to bake cookies a while back, and reached for Martha Stewart’s Cookies, this recipe just jumped off the page. The fact that they were quick and required no resting time made it all the more appealing.


As I’ve said time and time again, making cookies does not come easily to me. I often have issues with my dough being too dry, and I often find that my cookies are chewier than I would like. But these… I have to say, they were just right. It’s probably due to the fat contained in the peanut butter, but they were perfectly crisp and friable. I also love the fact that they contain brown sugar, which adds a very special kind of sweetness that lingers on the tongue, without being overpowering.

My father-in-law loved them so much he asked me for the recipe link. The texture reminded him of speculoos cookies, and he wanted to adapt the recipe by adding spices (cloves, cinnamon, nutmeg, ginger, and cardamom), to make it even more like speculoos. Now, I know that these traditional Belgian cookies have never been made with peanut butter, and that purists would probably hate the idea. But you know what? He was right: the resemblance in texture was definitely there. And when he made his spiced-up version, they did indeed taste and feel very much like speculoos. Which means I’m going to have to try, too. Of course, they won't be peanut butter cookies anymore...


So, while you’re waiting to find out how my pimped-out peanut butter cookies turn out, why don’t you go ahead and try the regular version? It’s simple, but foolproof and seriously dreamy.

Sunday, March 14, 2010

Daring Cooks' March Challenge - Risotto


The 2010 March Daring Cooks challenge was hosted by Eleanor of MelbournefoodGeek and Jess of Jessthebaker. They chose to challenge Daring Cooks to make risotto. The various components of their challenge recipe are based on input from the Australian Masterchef cookbook and the cookbook Moorish by Greg Malouf.

This month’s Daring Cooks’ challenge was pretty familiar to me: I’ve made risotto often. Although I have to admit, for the longest time I didn’t even consider making it: I used to think it was a fancy, complicated dish. But it’s actually fairly simple, albeit a little time consuming.

It’s also extremely versatile, which makes it convenient as hell. I’ve made risotto with smoked salmon and asparagus, aragula and gorgonzola, lemon and mushrooms… For this challenge, I decided to steer away from Italian flavours, and take the fusion road.


Fusion cuisine is not something I do often. I prefer discovering national cuisines and understanding how they work and blend flavours, before messing around with them. And since I always feel like I still have much to learn, I never get around to fusing. But I have come across fusion recipes that worked out extremely well. And it seemed like the perfect way to get creative with this challenge.

One of the requirements was to make our own stock. I delegated most of this task to Laurent, because he is the stock expert in the house. Me, I know how to make stock, but he seems to enjoy it so much more than I do – the exceptions being Asian stocks, such as Japanese dashi and Vietnamese pho broth: that’s my territory.

We used out usual stock recipe, since we know it works with any dish: one whole chicken, a couple of extra breasts, celery, carrots, onion, peppercorns and a classic bouquet garni (parsley, thyme, and bay). And quite a bit of salt. We simmered it at low heat for 3 hours, and ended up with 3 litres of deep, clear stock – along with loads of poached chicken meat, to use in salads.


For my first fusion experiment, I made a Tex-Mex Risotto, with sautéed bell pepper, black beans, corn, red Spanish onion, grated Monterey Jack cheese, jalapeno, and fresh cilantro. But, even though Tex-Mex cuisine tends to use long grain rice, I stuck with Italian Arborio rice, which works best for risotto. The result was really pretty good. And the fusion really didn’t taste weird at all: on the contrary, it felt natural. It might seem like I put a lot of stuff in there, but I always make risotto this way. To me, risotto is always an all-in-one meal, because I find it too filling to be a side-dish. So I always try to incorporate veggies and protein in there.


I took it a step further for my second try: Japanese risotto. Again, I used Arborio rice, because Japanese rice would probably have yielded a sticky mess. But instead of regular onions for the risotto base, I used scallions. And I deglazed the rice with sake, instead of the usual white wine. Finally, I replaced the chicken stock with diluted miso (not too much, otherwise the meal would have been way too salty – but enough to imbibe the rice with umami). I garnished the risotto with sautéed shiitake, and salmon teriyaki.


It came out great, I thought. The slightly salty rice contrasted well with the sweet-and-salty teriyaki – I made a point of not blending the ingredients too much, so as to prevent the sauce from getting everywhere and killing the miso. And the shiitake added a nice chewy texture to the mix. The rice was creamy and moist, very different from the usual sticky rice that comes with Japanese cuisine.

So, thank you to Eleanor and Jess for this fun, versatile challenge! Please check out the challenge recipes over at the Daring Kitchen: there are yummy risotto ideas, including preserved lemon, or pumpkin risotto! And don’t forget to check out the other Daring Cooks’ dishes!


Tex-Mex Risotto

Serves 3-4

For the risotto base:
2 tbsp olive oil
1 medium Spanish red onion, diced
200g (7 oz) Arborio rice
1 tbsp whole cumin seeds
120 ml (1/2 cup) dry white wine
1 litre (4 cups) homemade chicken stock

For the vegetable topping:
1 tbsp olive oil
1 red bell pepper, seeded, cleaned, and cut into strips
1-2 jalapeno peppers, seeded and finely chopped
250 ml (1 cup) cooked black beans, drained and rinsed
250 ml (1 cup) corn kernels, canned or frozen

Final touches:
80 ml (1/3 cup) shredded Monterey Jack cheese
A handful of fresh cilantro leaves, washed and chopped
Salt to taste


Heat the chicken stock in a separate saucepan, until steaming. Keep warm.

Prepare the vegetables:
In a skillet, heat 1 tbsp olive oil over medium-high heat. Add the bell pepper and the jalapeno, and stir-fry until tender. Add in the black beans and corn kernels and cook until heated through. Remove from heat and set aside.

Make the risotto base:
In a large, heavy-bottomed pot, heat 2 tbsp of oil over medium heat. Add the diced red onion and cook until tender. Add the rice and the cumin, and stir to coat each grain in oil. Pour in the wine and continue cooking until the liquid has evaporated or been absorbed.

Pour a ladleful of hot stock over the rice. Cook, stirring constantly with a wooden spoon, until all the stock has been absorbed. Repeat these steps until the rice is almost cooked to your liking.

Assemble the dish:
In the final minutes of cooking, add the cooked vegetables to the rice and stir them in. Continue cooking until warmed completely. At the last minute, stir in the shredded cheese. Adjust seasoning if necessary.

Serve immediately and garnish with chopped cilantro.


Japanese Risotto

Serves 2-3

For the risotto base:
2 tbsp olive oil
3-4 scallions, chopped
200g (7 oz) Arborio rice
60 ml (1/4 cup) sake
1 tbsp white miso, diluted in 1 litre (4 cups) warm water

For the salmon teriyaki:
60 ml (1/4 cup) sake
60 ml (1/4 cup) mirin
30 ml (1/8 cup) soy sauce
1 tbsp sugar
300g (10.5 oz) salmon fillet, skinned
1 tbsp olive oil

For the shiitake:
360 ml (1 1/2 cup) shiitake mushrooms, washed, stemmed and sliced
1/2 tbsp canola oil
Salt, to taste


Prepare the salmon teriyaki:
Combine the soy sauce, mirin, and sake in a small saucepan. Stir in the sugar and cook over low heat, until the sugar has dissolved. Transfer to a bowl or deep plate, and let cool completely. Add the salmon fillet and marinate in the fridge for 30 minutes.

Remove the salmon from the marinade, shaking off any excess liquid. Make sure to reserve the marinade. In a skillet, heat 1 tbsp olive oil over high heat and sear the salmon to your liking; do not let it get too dry inside. Remove the salmon from the pan, and cut it into chunks. Reserve.

Transfer the marinade into a saucepan and cook over medium heat, until the sauce has thickened considerably (it should form a slightly liquid glaze). Reduce heat and add the salmon, stirring gently to coat the chunks of fish. Keep warm over low heat and reserve.

Prepare the shiitake:
Heat 1/2 tbsp oil in a wok over medium-high heat. Add the shiitake and stir-fry until tender. Salt to taste, remove from heat, and reserve.

Make the risotto base:
In a large, heavy-bottomed pot, heat 2 tbsp of oil over medium heat. Add the sliced scallions and cook until tender. Add the rice, and stir to coat each grain in oil. Pour in the sake and continue cooking until the liquid has evaporated or been absorbed.

Pour a ladleful of hot miso broth over the rice. Cook, stirring constantly with a wooden spoon, until all the liquid has been absorbed. Repeat these steps until the rice is almost cooked to your liking.

Assemble the dish:
In the final minutes of cooking, add the sautéed mushrooms to the rice and stir them in. Continue cooking until warmed completely. Divide the risotto into individual servings, and top each plate with a helping of warm salmon. Serve immediately.

Thursday, March 11, 2010

All American (?) Burgers


Burgers are one of the reasons I’m happy to be living in North America. Sure, burgers aren’t unknown in Belgium: we have McDonald’s over there, just like everywhere else (except for Iceland, apparently), and we even have our own national hamburger-based fast-food chain, Quick. And there are certainly places of higher quality, such as bistros, that have burgers on their menu (David Leibovitz has listed quite a few in Paris). But to my knowledge, the idea that you can gourmet-up a burger hasn’t made its way quite as much as it has on this side of the ocean.

In other words, only in North America could Bobby Flay’s Burgers, Fries & Shakes have been published. This book is by no means a new release (it was published all the way back in 2009), but I took my time buying it. I really wasn’t sure if it was worth buying a whole book on such a limited subject. But in the end, the originality of the recipes won me over, and I haven’t regretted the purchase.


The title doesn’t lie: this book really is all about burgers, fries, and shakes. But there are many, many variations on each topic, as well as an extra section dedicated to pickles, relishes and sauces. Everything you need to spend way more time on a burger than you normally would – but that’s precisely what makes the process special.

I admit I have barely dipped a toe in the pool of recipes available (and I also admit that was a horrible metaphor). And I’ve been too timid, or too rushed to try some of the more extravagant recipes that sound (and look) more like mixed salads than anything else, like the Greek Burger or the Turkey Cobb Burger. Just by looking at the pictures, it’s clear that, while Bobby Flay doesn’t like to add stuff to the patties themselves, he goes all out when it comes to the extras.

So far, I’ve tried the Argentinean Burger, which is garnished with chimichurri (featured above). I had barely heard of chimichurri, and was only vaguely aware that it was a parsley-based savoury spread. I had also never tasted Manchego cheese, which was the recommended variety for this burger – and I have to say, it was a very pleasant discovery. It was sharp and salty, but nowhere near as aggressive as, say, parmesan. All in all, a great combination, and one that I would never have thought of.


Another favourite was the Wild Mushroom-Cheddar Burger, which kind of speaks for itself. This was more classic, but still a definite winner – but maybe that’s because I love mushrooms in anything. I made the effort of preparing the optional chipotle ketchup for garnishing, and it was another worthy discovery. I feel like I’m learning a lot from this deceptively simple book.

There are also a lot of useful general tips, things you can apply to any burger. Like making an indentation in the middle of the patty with your thumb, to ensure even cooking. Or using meat that contains at least 20 per cent fat, for maximum flavour. However, I have to admit that I have regularly cheated on this rule, and that I substitute bison for beef whenever I can (i.e., whenever I can find bison at the supermarket). I am seriously in love with ground bison meat: it’s incredibly lean, and I love its slightly strong, gamey flavour. And yes, the absence of fat does mean that my burger patties hold together a little less well (although I have yet to see one fall apart completely), and that they might be a little less juicy – but then, since I like my meat rare, my burgers never have the time to get too dry.

No recipes today, since I didn’t adapt the ones from the book. But surely this can spread a little inspiration, no?

Thursday, March 4, 2010

How to use fresh mozzarella in winter - Pizza Scappata

Laurent’s father is a stereotypical Italian in many ways. First of all, cheese plays a big part of his cooking: he always has at least five different kinds of really good cheese in his fridge. But another of his “Italian” traits is that he is extremely generous – including with his cheese. Whenever Laurent and I come over for dinner, chances are we will return home with a brick of parmesan, a wedge of Oka (often mushroom-flavoured, because he knows I love it), a cylinder of provolone, or a slab of smoked Jarlsberg.

Fresh mozzarella is also a regular part of our loot. In the summer, we rarely get very creative with it, and almost invariably turn to the classic Caprese salad. But in the winter, good tomatoes are hard to find. Furthermore, when it’s chilly outside, I find myself less easily satisfied by a cold dinner: I need something hot to warm myself.


So, how do you make a hot dish with fresh mozzarella, without altogether killing its flavour? Because it seems like a waste to just use it in a gratin or casserole, where grated dry mozzarella (or any number of other cheeses) works just fine…

We recently found a solution in Josée di Stasio’s Pasta Et Cetera: a recipe for pizza scappata. “Scappata” means “escaped,” or “runaway.” Basically, this is a pizza without the dough (which has “escaped”): you make your tomato sauce in a shallow pan, gently melt the mozzarella slices, add seasonings, and you’re done! All you have to do is scoop up the mixture with rustic bread… or homemade focaccia, if you happen to have a little time on your hands.


It’s a ridiculously simple recipe, but it’s just so comforting and homey, we keep coming back to it. Josée di Stasio keeps her flavours basic, with just a little fresh basil. But winter doesn’t just make me want warm meals, it also makes me crave strong flavours and spices. So I like to add things like anchovies and red pepper flakes. Anything works, as long as you can scoop it up easily.


Pizza Scappata
Adapted from Pasta Et Cetera à la Di Stasio

Serves 4 as an appetizer, or 2 as a meal

2 tbsp olive oil
2 garlic cloves, cut in half
One 540 ml (19 oz) can of diced tomatoes
2 tsp tomato paste
1 ball of fresh mozzarella
6-8 preserved anchovy filets, drained
A big handful of basil leaves
Salt and pepper, to taste
A dash of hot pepper sauce, such as Tabasco (or substitute with red pepper flakes)
Crusty bread (or focaccia), for serving

In a large skillet, heat the olive oil over low heat. Add the garlic and let it flavour the oil for a few minutes. Do not let the garlic brown.

Raise the heat to medium-high and add the canned tomatoes. Cook for about 10 minutes, stirring often, until the tomatoes are soft. Stir in the tomato paste and the pepper sauce (or red pepper flakes), and continue cooking until the mixture is slightly reduced. Remove the garlic and discard.

Reduce heat to medium-low. Thinly slice the mozzarella and place the slices over the tomatoes, in a regular pattern. Without stirring, let the cheese melt (cover the skillet with a lid if necessary). This should take 1-2 minutes. In the meantime, coarsely chop the anchovies and sprinkle them over the mixture.

When the cheese is completely melted, remove the skillet from heat. Shred the basil leaves and scatter them over the pan. Adjust seasoning with salt and pepper, and serve immediately. Eat directly from the pan, scooping up the mixture with the bread.

Saturday, February 27, 2010

Daring Bakers' February Challenge: Tiramisu


The February 2010 Daring Bakers’ challenge was hosted by Aparna of My Diverse Kitchen and Deeba of Passionate About Baking. They chose Tiramisu as the challenge for the month. Their challenge recipe is based on recipes from The Washington Post, Cordon Bleu at Home and Baking Obsession.

I’ve always had a special fondness for tiramisu. I remember the first time I ever tried it: I was still quite small, and my mother had ordered it at a restaurant. I eyed the thick, white, cocoa-dusted concoction with some suspicion: it looked a lot like whipped cream, which I didn’t like. But I tried a bite – and then asked for another. It was one of the first times I found myself enjoying something without having the faintest idea of what was in it.


Tiramisu was also the first dessert Laurent ever made for me. His father has a killer tiramisu recipe, although it’s quite different from the traditional one. Most tiramisu recipes I’ve come across consist in ladyfingers dipped in espresso, and stacked with a mixture of mascarpone cheese, raw egg yolks, and whipped egg whites. Laurent’s family version, however, is egg-free: the filling consists only of espresso-flavoured mascarpone, folded with sweetened whipped cream. It has the advantage of freezing very well, and if you eat when it’s only half-thawed, it’s like eating a really fancy ice cream.

But Aparna and Deeba, our hostesses for this month’s Daring Bakers’ challenge, gave us yet another kind of recipe. And to make it even more challenging, they asked us to make our own savoiardi biscuits (a.k.a. ladyfingers) and mascarpone cheese. Talk about making it from scratch!

This was definitely one of the most interesting challenges I’ve ever taken part in. It was also one of the weirdest ones, as far as my experience was concerned: it’s like practically every isolated part of the challenge ended up slightly wonky and flawed – and yet, when combined, they yielded a perfectly respectable – dare I say delectable – dessert.

First, the savoiardi biscuits. I have a hard time with cookies: they rarely come out perfect. Still, I was less nervous about these, since they were destined to be hidden away inside the tiramisu anyway. I knew I wanted to make individual dessert portions, rather than a full-sized cake, so I customized my biscuits to fit my serving bowls and made them itty-bitty: they were more like ladypinkies, or babyfingers, than ladyfingers.


Making the batter and piping it was no problem: I managed to not crush my whipped egg whites, so the batter was nice and light. I sprinkled it twice with icing sugar, as indicated. However, I failed to properly shake the excess sugar off the baking sheet… You know that feeling, where you not only know something is going to go wrong, you know exactly why it will go wrong, and yet you still choose not to do anything to prevent it? I knew that the excess sugar would caramelize and burn in the oven – everyone knows that. But for some reason, I left it there, as if I wanted to see for myself.

So, inevitably, my savoiardi biscuits ended up with a layer of burnt caramel on the bottom. But the top part was still acceptably light and puffy. Good enough for me!

Next, the mascarpone cheese. Heating the heavy cream in a makeshift double-boiler took much longer than it was supposed to, but apparently I wasn’t the only to have this problem. In the end, I got tired of waiting, poured in my lemon juice, and let everything thicken. Then I drained the concoction and let it hang out in the fridge for 24 hours, hoping for the best. When I took it out, my “cheese” was as hard as ice-cold butter! Fortunately, it didn’t taste like butter… It would have to do.

Next came the zabaglione, an egg yolk-based custard, flavoured with Marsala wine. This also involved a double-boiler. I hadn’t made custard of any kind in a long time, and had forgotten how much they can set overnight in the fridge. So while there were no significant problems with the zabaglione, it was, in fact, slightly overcooked.

I had the same problem with the pastry cream: I overcooked it, and it ended up with something that was almost more like flan, the way it held together.


So, in the end, none of my individual tiramisu components would have been acceptable if they had been meant to be eaten on their own, or as a star ingredient in a dessert. Fortunately, there was no “star” here. As it turned out, the components balanced out each other’s flaws, and came together in harmony. First, I mercilessly beat the stiffness out of my mascarpone with a fork. Then I energetically whisked in the zabaglione and pastry cream, until I had something that was actually almost creamy, instead of mostly lumps. And when I folded it the sweetened whipped cream and saw how smooth and silky it made everything, I knew this was going to be OK.

I wanted to try something other than the usual espresso-flavoured tiramisu, so I made two versions. For the first, I dipped the biscuits in a mixture of blackcurrant liqueur (a.k.a. cassis), simple syrup and blackcurrant syrup (for extra aroma); we’re quite the cassis fans around here. Then I topped it with fresh raspberries – they were ridiculously expensive, but I really, really wanted them in this dessert. I didn’t add anything to the cream, so that I could sample the naked flavour; it was actually really, really good, with just a subtle note of Marsala. I was glad to have cut down on the vanilla extract here and there, as I’m not too fond of it when it’s overpowering.

For the second version, I dipped the biscuits in Bailey’s Irish Cream, and added a handful of melted dark chocolate discs to the cream. Combining Bailey’s and chocolate was a no brainer: they just go together. And this version was definitely better suited to winter.


A final word: normally, tiramisu is ready to be served 24 hours after it is made. But in my case, it tasted much better the day after that: the biscuits had absorbed more moisture, making the textures and flavours blend, leading to a smoother, creamier dessert, whereas the biscuits stood out too much after only 24 hours. But it could just be because my biscuits were a little odd to begin with.

I definitely learned a lot with this challenge. And I was also reminded of a lot (such as: custards and creams don’t need to be quasi-solid before going in the fridge). And I had fun – lots of fun. I want to thank Deeba and Aparna for this terrific challenge, and I recommend that you go to the Daring Kitchen to check out the challenge recipe and the other Daring Bakers’ tiramisu!

Tuesday, February 23, 2010

Feeling Fancy - Sweet-and-sour Duck Confit with Trimmings


Duck is one of those meats that I really love, but don’t serve all that often. Something about it just screams “special occasion” to me, and keeps me from thinking of it as a go-to ingredient. Chicken is a go-to ingredient; duck is not. That’s OK, though: we need dishes for special occasions.

Sometimes, however, the meal can just be the special occasion. Sometimes, I just feel like making something a little fancy, a little delicate, a little… pretty. On those days, I flip through my cookbooks. And it just so happens that Louis-François Marcotte’s latest baby, entitled Sexy: Cuisiner pour deux, is full of recipes that are simple, yet give you that fancy vibe. The concept of the book is that it’s all about cooking for two – preferably as a couple (hence the title). And the recipes we’ve tried so far have all been hits.


The book isn’t perfect, especially where cooking methods are concerned. Caramelizing a side-dish of endives took forever in the oven, whereas the same result could easily be obtained on the stovetop, in only a fraction of the time. Also, the book (which is only available in French at the moment) sometimes includes inexplicable vocabulary errors, such as using the word “roasted” when the ingredients are clearly being “sautéed” or “pan-fried.” Then again, I’m extremely finicky when it comes to using le mot juste (the right word), so maybe I’m the only person who is actually bothered by this.

But the beauty of Marcotte’s recipes is that they are inspiring. It’s probably not the best book for anyone taking their first steps in the kitchen; but if you can cook a little, or a lot, there’s definitely much to like about Sexy. As I said, the recipes are really quite simple, but the flavour and texture combinations are carefully - almost lovingly - crafted, and they will readily give you ideas for variations.

Like the recipe for duck confit with leeks and mashed celeriac. I didn’t alter the recipe the first time I made it, but you could probably take a guess at how it was made just by looking at it: the ingredients are cooked separately, then assembled inside a deep baking ring, and heated in the oven. It’s easy as pie (much easier than pie, really), it looks beautiful, and it tastes amazing.


The only thing I thought it was missing was a little moisture: some kind of sauce. So I decided to adapt one of my favourite duck breast recipes, and mould it to this concept. Usually, I simply sauté whole duck breast, coat it in a vinegar-and-honey shallot sauce, and serve it with sautéed apples and some sort of vegetable. This is basically the “stacked” version of this dish. And it worked out pretty well, if I do say so myself.


Ready-made duck leg confit is available at most grocery stores around here. But I was in a gung-ho mood when I made this, and decided to make my own duck confit. It was surprisingly easy, and not time consuming at all: granted, the cooking time is lengthy, but it doesn’t require you to actually do anything. And it’s worth it, as storebought duck confit tends to be slightly more expensive, yet skimpier on the meat.


Anyways, enjoy the recipe. I know I did!

Sweet-and-sour Duck Confit with Celeriac Mash, Sautéed Apple, and Stir-fried Shiitake

Serves 2

For the duck preparation:
2 raw duck thighs, or 2 duck confits (cooked duck thighs preserved in fat)
2 tbsp olive oil
1 tbsp butter
2 shallots, finely chopped
3 tbsp raspberry vinegar, or sherry vinegar
3 tbsp mild liquid honey
Salt and pepper, to taste

For the celeriac mash:
1 small celeriac, peeled and cut into chunks
1-2 tbsp butter
1/4 cup milk
Salt and pepper, to taste

For the sautéed apple:
1 Golden Delicious apple, sliced
1 tsp butter
1 tsp olive oil

For the shiitake:
250 ml (1 cup) shiitake mushrooms, stemmed and sliced
1 tbsp olive oil
1 clove garlic, minced
2 tbsp flat leaf parsley, chopped


Make the duck confit (if using raw duck):
Preheat oven to 140ºC (275ºF) and line a baking sheet with parchment paper. Trim the duck thighs of any excess fat, but leave the skin on. Brush with 1 tbsp olive oil, and season with salt and pepper. Place thighs on prepared baking sheet and bake for 2 to 2 1/2 hours. For a crispy skin, raise heat to 200ºC (400ºF) during the last 20 minutes of baking. Let cool. (This can be made a day in advance and refrigerated, then reheated when ready to use.)

Make the celeriac mash:
Bring a large pot of salted water to a boil. Boil the diced celeriac for about 15-20 minutes, until you can easily penetrate it with a fork. Drain, return to pot, then add the butter, salt, and pepper. Mash by hand with a potato-masher, gradually incorporating the milk, until you obtain the desired texture. Keep warm over low heat.

Prepare the duck:
Shred the cooled duck confit with a fork (or your fingers), and reserve. Heat the remaining 1 tbsp of olive oil in a frying pan over medium heat, then add the shallot and sauté until it begins to turn translucid. Deglaze with the vinegar and cook for 1-2 minutes, letting the shallots absorb the flavour. Stir in the honey, then the butter. Finally, stir in the duck, making sure to coat it well in the sauce, and heat through. Keep warm and reserve.

Make the stir-fried shiitake:
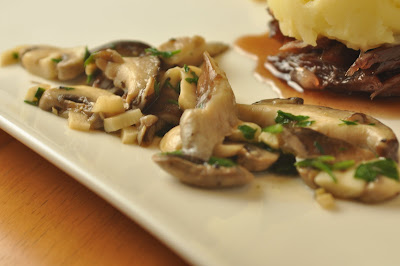
In a wok, heat the olive oil over medium-high heat. Add the garlic, and cook for about 2 minutes. Throw in the shiitake mushroom slices, and stir-fry, stirring often, until they are browned and tender (try not too overcook them). Stir in the chopped parsley, reduce heat, and keep warm.

Sauté the apple:
Melt the butter with the olive oil in a small frying pan, over medium-high heat. Toss in the apple slices, and sauté, stirring and flipping occasionally, until they are browned. Do not let them get too mushy. Reduce heat, keep warm and reserve.

Assemble the final dish:
Put two deep baking rings on a baking sheet. Press a layer of shredded duck on the bottom, then top with the celeriac mash. Set the oven to broil, and bake for 3 minutes, to heat everything through. (NOTE: If you do not have baking rings, you can use ramekins and serve your dish in them.)

Carefully unmold the duck and celeriac rings onto individual plates. Serve with a side of shiitake mushrooms and sautéed apples.