Wednesday, July 27, 2011
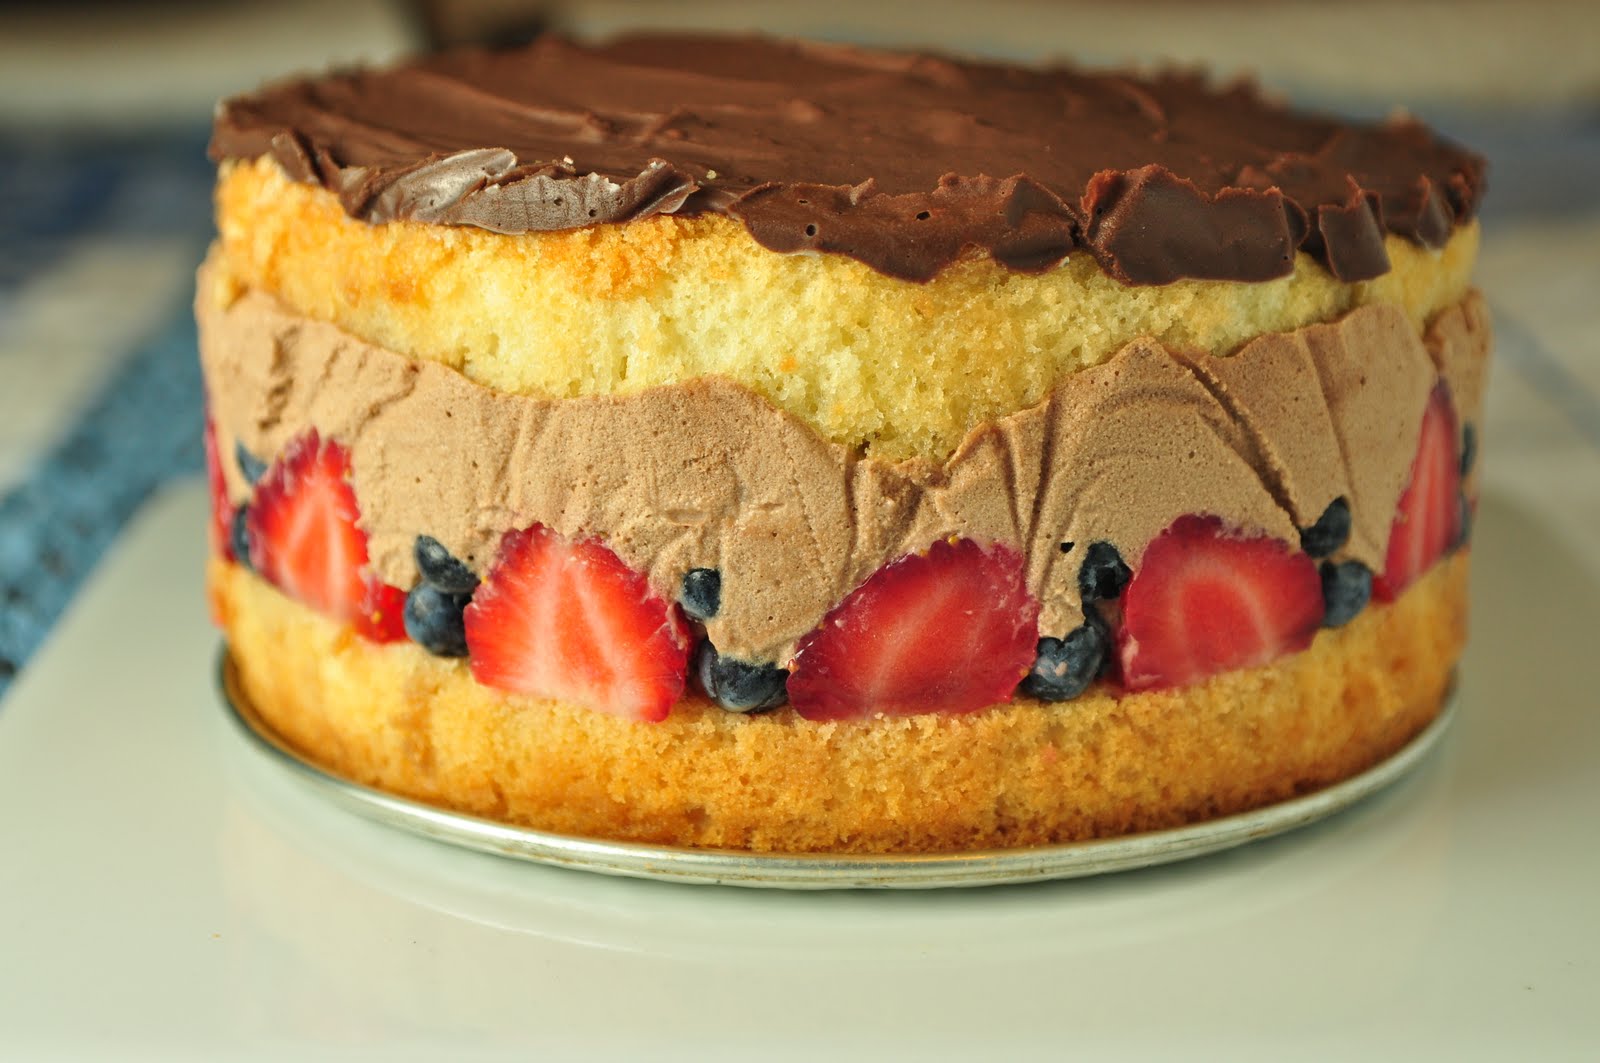
Daring Bakers' July Challenge - Fraisier
Thursday, January 27, 2011
Daring Bakers' January Challenge - Biscuit Joconde Imprimé / Entremets
The January 2011 Daring Bakers’ challenge was hosted by Astheroshe of the blog accro. She chose to challenge everyone to make a Biscuit Joconde Imprime to wrap around an Entremets dessert.
I was not looking forward to making this month’s Daring Bakers’ challenge. In fact, I put it off until the last possible minute. Why? Because it looked freaking hard.
To me, an entremets was something you serve between courses in a meal, to cleanse the palate, like a sorbet, or a shot of liquor. But the kind of entremets we were required to make this month was actually a dessert. The core of the challenge was to make a decorated biscuit Joconde, to wrap around a mould and then fill with whatever kind of sweet filling we chose.
It was the decorating part that had me scared. Making desserts look fancy and pretty has never been my forte, and I’d never worked with décor paste. In fact, I did have some trouble with that part. I wanted to make a simple striped pattern, but somehow my stripes all but disappeared during the baking process. Oh well, at least my Joconde is a cool, funky pink!
Once the tricky Joconde part was done with (and it really wasn’t all that difficult to make, apart from the disappearing stripes), I had some fun with the filling. I made three separate layers: lemon curd, raspberry mousse, and chocolate mousse – three of my favourite flavours. They half detached from the Joconde wrapping when I cut out pieces, but other than that I was quite pleased with the combination.
So, Asteroshe, thank you for pushing me to make more of a presentation effort with this challenge – even if I didn’t quite succeed in reproducing the picture I had in my head, it was still a great learning experience.
Don’t forget to check out the challenge recipes at the Daring Kitchen, along with the Daring Bakers’ blogroll!
I’ve decided to include the recipes for filling components, since they were initially components of different desserts. This filling would actually make a great dessert on its own, without the Joconde wrapping: just pour the layers in individual ramekins or glasses. The recipes were somewhat adapted for the purpose of this particular project. Namely, I slightly overcooked the lemon curd, and purposefully made the chocolate mousse drier than if it had been a standalone dessert, so that the entremets would hold together.
Lemon curd
Adapted from Tout un chef! Patrice Demers
The juice of 3 lemons
3 eggs
100g (3.5 oz, 1/2 cup) granulated sugar
100g (3.5 oz, 1/2 cup) butter, cut into pieces
1 sheet of gelatine
Soak the gelatine in cold water until softened (about one minute), then drain and reserve.
Combine the lemon juice, eggs, sugar, and butter in a saucepan, and whisk over medium heat until butter is melted. Whisking constantly, bring to a boil and cook until thickened (you should be able to make visible, lasting traces with your whisk). Remove from heat and stir in the gelatine. Strain, pour into mould, and chill.
Raspberry mousse
From José Maréchal’s Macarons
125g (4.5 oz) frozen raspberries, thawed
4 sheets of gelatine
240 ml (1 cup) heavy cream
2 egg whites
60g (1/3 cup) granulated sugar
Soak the gelatine in cold water until softened (about one minute), then drain and reserve.
Purée the raspberries with a blender or hand mixer. Transfer to a saucepan, cook over low heat, and stir in the gelatine until dissolved. Remove from heat, let cool, and reserve.
Whisk the egg whites into stiff peaks, adding the sugar gradually.
Beat the cream into stiff peaks.
Using a flexible spatula, gently fold the raspberry coulis into the whipped cream. Fold in the egg whites. Pour into mould, and chill.
Chocolate mousse
From Patrice Demers’ La carte des desserts
500 ml (2 cups) heavy cream
125 ml (1/2 cup) whole milk
125 ml (1/2 cup) heavy cream
2 tbsp granulated sugar
3 egg yolks
350g (12 oz) dark chocolate discs or chips
Beat the 500 ml of cream into stiff peaks. Reserve.
In a small bowl, whisk the egg yolks together with 1 tbsp sugar. In a saucepan, bring the remaining cream, the milk, and the remaining sugar to a boil. Pour the boiling liquid gradually over the egg yolks, whisking constantly. Return to the saucepan and cook, stirring constantly, until thick enough to cover the back of a wooden spoon. Pour the mixture through a strainer onto the chocolate, and let sit for one minute. Whisk the chocolate and cream mixture together, until smooth.
With a flexible spatula, fold the whipped cream into the chocolate mixture. Pour into mould and chill.
Saturday, November 27, 2010
Daring Bakers November Challenge - Crostata
The 2010 November Daring Bakers’ challenge was hosted by Simona of briciole. She chose to challenge Daring Bakers’ to make pasta frolla for a crostata. She used her own experience as a source, as well as information from Pellegrino Artusi’s Science in the Kitchen and the Art of Eating Well.
I love pies and tarts. I really do. I think, in most cases, I’ll choose them over cake. So this month’s Daring Bakers’ Challenge, crostata, was good news for me! Crostata is a traditional Italian tart, made with short crust pastry. I’ve been wondering what the difference is between short crust pastry and short pastry (or pâte brisée) Apparently, the main difference is that short pastry contains water. And then, you have pâté sablée, which is closer to short crust pastry, but has a higher butter content. So many doughs, so little time.
I made my first ever crostata a few months ago, to bring to a dinner party; while I obviously didn't make it as part of this challenge, I thought I might as well included it here, since I haven't posted about it yet. I used pâte brisée, and made an apple filling. I quite like the rustic look of free-form crostate, and they’re so easy to make. But, although the dough was perfect, I found that the apples were undercooked to my taste.
The challenge required us to make pasta frolla (short crust pastry), which was easy enough to make. It was very crumbly, and I had trouble rolling it out evenly, but it was also quite forgiving, in that it allowed me to patch up any holes or tears very easily.
We were giving free range for the filling. Our hostess, Simona, suggested filling the tart with jam, or pastry cream, before baking it. But I wasn’t in the mood for a jam tart. As for pastry cream, I already knew how to make it, and I tend to prefer it unbaked. There was the possibility of blind baking the crust entirely and then filling it with fresh pastry cream and fresh fruit. That last option was most appealing to me, but it also had the inconvenience of not keeping very long. What to do, what to do?
In the end, I used a recipe from Marcy Goldman’s A Passion for Baking, a variation on the traditional French chocolate silk pie. Traditionally, silk pies require no baking – but since they contain eggs, they are considered a little risky that way. I’m not too afraid of raw eggs (coming from a country where people have regularly freaked out about mad cow disease and dioxin-contaminated chicken, I think I’ve grown a little blasé about food poisoning in general), but I did want my crostata to keep for at least a few days. Marcy’s version features slightly non traditional ingredients, such as sweetened condensed milk, and is baked long enough to ensure safety. “Sounds good to me,” I decided.
Having never used sweetened condensed milk before, I didn’t know what to expect. The thick, gloopy mixture that poured out of the can wasn’t particularly appetizing, but then I’ve learned not to judge an ingredient based on first impressions. And I was right, because this was one of the best tarts I’ve ever made. There was a distinctive malty taste from the condensed milk, but it wasn’t too invasive, and the chocolate was still definitely the star. The crostata was sweet, but not cloying (although I was glad I’d cut out some of the sugar in the crust), and the filling was creamy and almost fudge-like. Fudge in a crust – who wouldn’t love that?
Speaking of the crust, I’d blind baked it for 15 minutes before filling it, as I often have trouble with underbaked pie bottoms. I had rolled it out quite thinly, and it was evenly baked, with a nice, sandy texture that nonetheless held together. I did try to decorate the top with the traditional lattice pattern of dough strips, but because my filling was so liquid before baking, the strips looked like they were sinking into it. It just seemed like a bad idea, so I removed them.
This was a very pleasant challenge, and the pasta frolla recipe is a keeper. Also, the Untraditional French Chocolate Silk Crostata will from now on be one of my go-to recipes for dinner parties. Thank you, Simona, for these discoveries!
Don’t forget to check out the challenge recipes, and to go through the Daring Bakers’ blogroll!
Tuesday, March 30, 2010
Daring Bakers' March Challenge - Orange Tian
The 2010 March Daring Baker’s challenge was hosted by Jennifer of Chocolate Shavings. She chose Orange Tian as the challenge for this month, a dessert based on a recipe from Alain Ducasse’s Cooking School in Paris.
*rush rush rush rush rush* Whew!
Obviously, I am very, very late for this month’s Daring Bakers’ Challenge, and I apologize for that. It’s been very stressful and busy lately, and I just couldn’t put the time aside. Still, it’s the first time I’ve ever been late, with 11 challenges under my belt… so it’s not a terrible track record yet.
I wasn’t familiar at all with Orange Tian. Whenever I mentioned tian to anyone, they associated it with vegetables. But what we were challenged to make by Jennifer, our hostess, was a layered dessert consisting of pâte sablée, citrus marmalade, stabilized whipped cream, and caramel-infused citrus segments.
I had made pâte sablée before, and it was as forgiving and delicious as I remember. It’s a very rich pastry dough that could practically be eaten as a cookie, thanks to its crumbly texture. It goes great with fruity concoctions.
We were free to use any kind of citrus for this challenge. I initially wanted to use blood oranges, but my grocery store was out of them, so I stuck with plain old oranges. The first step was to make marmalade. Now, I’m not much of a jam-maker: I just don’t like cooking fruit, I prefer to eat them fresh. But every now and then, it’s a fun process to go through. I slightly overcooked my marmalade, but it was good enough to serve its purpose.
It had been a long time since I had last made caramel. I think it’s always going to be scary: the hissing and spattering when you pour the liquid over the boiling sugar always makes me feel a little overwhelmed. But I’m getting used to it.
I had never segmented an orange before, because I just don’t use oranges much in my cooking and baking. And when I do, I only use the zest and the juice. Properly skinning and cutting out the segments took some practice, and was a lengthy process. After two oranges, I was ready to throw down my sticky fruit knife. But by the sixth and final one, I was actually starting to enjoy it.
Finally, I’m very happy to have learned how to make stabilized whipped cream, because I can think of so many applications for it. It’s basically just whipped cream with gelatin, but it does hold so much better and longer than the regular kind.
I used deep baking rings to assemble four little tians. They were a bit too large for one person, but perfect for sharing. We were instructed to freeze the tians for ten minutes, but I made them ahead and froze them for a few hours, thawing them 30 minutes before serving, to give me time to take pictures.
They were still a little frozen when we dug into them, but it wasn’t a bad thing: the cream tasted a little like frozen yogurt. I did like the orange tian, but if I make this again, I would definitely try more complex flavours. However, I do love the concept, and I want to thank Jennifer for introducing us to it. It's a very good-looking, fresh-tasting dessert that is sure to make an impression on guests!
So, um, better late than never?
Saturday, February 27, 2010
Daring Bakers' February Challenge: Tiramisu
The February 2010 Daring Bakers’ challenge was hosted by Aparna of My Diverse Kitchen and Deeba of Passionate About Baking. They chose Tiramisu as the challenge for the month. Their challenge recipe is based on recipes from The Washington Post, Cordon Bleu at Home and Baking Obsession.
I’ve always had a special fondness for tiramisu. I remember the first time I ever tried it: I was still quite small, and my mother had ordered it at a restaurant. I eyed the thick, white, cocoa-dusted concoction with some suspicion: it looked a lot like whipped cream, which I didn’t like. But I tried a bite – and then asked for another. It was one of the first times I found myself enjoying something without having the faintest idea of what was in it.
Tiramisu was also the first dessert Laurent ever made for me. His father has a killer tiramisu recipe, although it’s quite different from the traditional one. Most tiramisu recipes I’ve come across consist in ladyfingers dipped in espresso, and stacked with a mixture of mascarpone cheese, raw egg yolks, and whipped egg whites. Laurent’s family version, however, is egg-free: the filling consists only of espresso-flavoured mascarpone, folded with sweetened whipped cream. It has the advantage of freezing very well, and if you eat when it’s only half-thawed, it’s like eating a really fancy ice cream.
But Aparna and Deeba, our hostesses for this month’s Daring Bakers’ challenge, gave us yet another kind of recipe. And to make it even more challenging, they asked us to make our own savoiardi biscuits (a.k.a. ladyfingers) and mascarpone cheese. Talk about making it from scratch!
This was definitely one of the most interesting challenges I’ve ever taken part in. It was also one of the weirdest ones, as far as my experience was concerned: it’s like practically every isolated part of the challenge ended up slightly wonky and flawed – and yet, when combined, they yielded a perfectly respectable – dare I say delectable – dessert.
First, the savoiardi biscuits. I have a hard time with cookies: they rarely come out perfect. Still, I was less nervous about these, since they were destined to be hidden away inside the tiramisu anyway. I knew I wanted to make individual dessert portions, rather than a full-sized cake, so I customized my biscuits to fit my serving bowls and made them itty-bitty: they were more like ladypinkies, or babyfingers, than ladyfingers.
Making the batter and piping it was no problem: I managed to not crush my whipped egg whites, so the batter was nice and light. I sprinkled it twice with icing sugar, as indicated. However, I failed to properly shake the excess sugar off the baking sheet… You know that feeling, where you not only know something is going to go wrong, you know exactly why it will go wrong, and yet you still choose not to do anything to prevent it? I knew that the excess sugar would caramelize and burn in the oven – everyone knows that. But for some reason, I left it there, as if I wanted to see for myself.
So, inevitably, my savoiardi biscuits ended up with a layer of burnt caramel on the bottom. But the top part was still acceptably light and puffy. Good enough for me!
Next, the mascarpone cheese. Heating the heavy cream in a makeshift double-boiler took much longer than it was supposed to, but apparently I wasn’t the only to have this problem. In the end, I got tired of waiting, poured in my lemon juice, and let everything thicken. Then I drained the concoction and let it hang out in the fridge for 24 hours, hoping for the best. When I took it out, my “cheese” was as hard as ice-cold butter! Fortunately, it didn’t taste like butter… It would have to do.
Next came the zabaglione, an egg yolk-based custard, flavoured with Marsala wine. This also involved a double-boiler. I hadn’t made custard of any kind in a long time, and had forgotten how much they can set overnight in the fridge. So while there were no significant problems with the zabaglione, it was, in fact, slightly overcooked.
I had the same problem with the pastry cream: I overcooked it, and it ended up with something that was almost more like flan, the way it held together.
So, in the end, none of my individual tiramisu components would have been acceptable if they had been meant to be eaten on their own, or as a star ingredient in a dessert. Fortunately, there was no “star” here. As it turned out, the components balanced out each other’s flaws, and came together in harmony. First, I mercilessly beat the stiffness out of my mascarpone with a fork. Then I energetically whisked in the zabaglione and pastry cream, until I had something that was actually almost creamy, instead of mostly lumps. And when I folded it the sweetened whipped cream and saw how smooth and silky it made everything, I knew this was going to be OK.
I wanted to try something other than the usual espresso-flavoured tiramisu, so I made two versions. For the first, I dipped the biscuits in a mixture of blackcurrant liqueur (a.k.a. cassis), simple syrup and blackcurrant syrup (for extra aroma); we’re quite the cassis fans around here. Then I topped it with fresh raspberries – they were ridiculously expensive, but I really, really wanted them in this dessert. I didn’t add anything to the cream, so that I could sample the naked flavour; it was actually really, really good, with just a subtle note of Marsala. I was glad to have cut down on the vanilla extract here and there, as I’m not too fond of it when it’s overpowering.
For the second version, I dipped the biscuits in Bailey’s Irish Cream, and added a handful of melted dark chocolate discs to the cream. Combining Bailey’s and chocolate was a no brainer: they just go together. And this version was definitely better suited to winter.
A final word: normally, tiramisu is ready to be served 24 hours after it is made. But in my case, it tasted much better the day after that: the biscuits had absorbed more moisture, making the textures and flavours blend, leading to a smoother, creamier dessert, whereas the biscuits stood out too much after only 24 hours. But it could just be because my biscuits were a little odd to begin with.
I definitely learned a lot with this challenge. And I was also reminded of a lot (such as: custards and creams don’t need to be quasi-solid before going in the fridge). And I had fun – lots of fun. I want to thank Deeba and Aparna for this terrific challenge, and I recommend that you go to the Daring Kitchen to check out the challenge recipe and the other Daring Bakers’ tiramisu!
Thursday, January 7, 2010
Celebrating the Epiphany - Cocoa-Pear Royal Galette
La Galette des Rois, or King Cake (though I personally prefer to call it Royal Galette), apparently exists in several versions. The one usually encountered in Belgium and France consists of puff pastry filled with frangipane. But its most distinctive trait is that it contains a fève. “Fève” translates as “broad bean,” but it’s not really a literal designation anymore: nowadays, the fève is usually a small porcelain or ceramic figurine, which is hidden inside the galette. When the cake is divided among the guests, the person who gets the fève becomes King (or Queen), and is allowed to choose a consort.
As far as I remember, being King never really got anyone special privileges, other than that of wearing a nice paper crown, and maybe not having to clear the table. But it’s a fun tradition. Normally, to ensure randomness, the youngest person of the group has to hide under the table and call out people’s names as the pieces of cake are distributed. But when I was little, my mother always cheated and made sure I got the fève. She never made the galette herself, but she would poke around to find the fève and give me the winning piece.
For some reason, it had never occurred to me to make the Royal Galette myself. But just a few days ago, we saw a short news report on galettes, and I was shocked at how… simple it was: a disc of puff pastry, covered with frangipane, and topped with another disc of pastry. “That’s it?!” I exclaimed. “I can totally do that myself!”
And that’s how I wound up baking la Galette des Rois this year.
We needed a fève. Fortunately, we had been served an early galette a few days ago, and Laurent had been crowned King. No shame in recycling the fève, after all. Besides, I have no idea where I could buy one… And I’d be afraid to use just any old figurine, for fear that it wouldn’t be ovenproof!
Even though making puff pastry no longer scares me, ever since that Daring Bakers’ vols-au-vent challenge, I used storebought pastry, out of sheer convenience. For the frangipane, I based myself on the recipe we were given for the Bakewell Tart challenge (gosh, I’ve learnt so much by being with the DBs!). But I wanted to make it a little different, so I added some cocoa and diced canned pear.
Everything went fine, and I was happy with the results: good blend of textures (flaky pastry against moist filling), nice combination of flavours. And yes, it’s a decadent treat, but it’s only supposed to be eaten once a year (or twice, in our case).
So, who took the fève? So far, no one: it was just me and Laurent, and neither of our pieces had the hidden prize. We couldn’t eat the whole thing, so we saved the rest and will try again tonight. Not particularly exciting, since the winner will inevitably choose the other as consort…
But like I said: the Epiphany is an excuse to eat galette!
Cocoa-Pear Royal Galette
Serves 8
500g (17 oz) puff pastry, thawed in the fridge
For the frangipane:
50g (1.75 oz, 1/4 cup) butter, softened
50g (1.75 oz, 1/3 cup) icing sugar
50g (1.75 oz, 1/3 cup) almond powder
1 egg
1 tbsp flour
1 tsp almond extract
1 tbsp rum (optional)
2 tbsp powdered cocoa
2 small canned pear halves, drained and diced
For assembly and finishing touches:
1 fève, or small ovenproof figurine
1 egg, separated
Preheat oven to 200ºC (400°F).
Prepare the frangipane:
Cream the softened butter with the sugar, until very fluffy and light yellow. Stir in the egg, until well combined. Add the almond extract and the rum, if using.
Gradually stir in the almond powder, then the flour, and finally the cocoa. Set aside.
Assemble the galette:
Divide the pastry in two equal parts. Roll each half into a 25cm (10 inch) disc, about 5mm (1/4 inch) thick.
Put a baking sheet on top of another baking sheet, and line it with parchment paper. Place one disc of pastry in the center of the prepared sheet. Spread the frangipane mixture over it making sure to leave a 1cm (1/2 inch) margin at the edge.
Take the diced pear and pat the pieces dry. Scatter the pear evenly over the frangipane, pressing the pieces slightly into the almond mixture.
Take the fève and press it into the frangipane in a random spot, at an approximately equal distance from the center and the edge of the disc. DO NOT place it at the center.
Take the separated egg and lightly beat the white. With a pastry brush, lightly brush the edge of the pastry with egg white. Place the second disc of pastry on top of the first, and press all around the edge to seal the frangipane in.
Whisk a tablespoon of water into the egg yolk. Lightly brush the top of the galette with this egg wash, being careful not to let it drip down the sides, which would inhibit the pastry from rising.
With the edge of a sharp knife, make decorative patterns on top of the galette.
Bake for 25 minutes. Then lower the oven to 160ºC (350ºF) and bake for another 10 minutes, keeping an eye on the galette to make sure it doesn’t colour too quickly. The pastry should be risen, crispy and golden.
Serve warm, or at room temperature.
Sunday, November 22, 2009
Macaron Mania - Green Tea, Chocolate, and Apricot Macarons
The platter began to fill with colourful little macarons. A fellow graduate student walked up to me and looked on.
“You didn’t bake for us today?” she asked. “I thought for sure you would make us one of those specialties of yours.”
“I did.” I replied with a grin. “I made these.”
“… Wait, you made these?!”
I’ve baked for Laurent. I’ve baked for my parents, my in-laws, and their friends. I’ve baked for my own friends. But I’ve rarely baked for my university colleagues, and never for events. But last week, the university reading group I’m part of was organizing a conference, and I had been asked to bake something sweet for the lunch and coffee breaks. Given how often I talk about food, word had gotten around that I like to cook and bake.
The consensus on macarons is that they are unstable, unpredictable, and capricious. In other word, they are total prima donnas. Until recently, I’ve had two kinds of outcomes with these cookies: batches where every single shell was misshapen and cracked, and batches where about half the shells looked smooth and round, while the other half was an irregular bust. In light of this, offering to make macarons for a public event seemed like a terrible idea.
But just before this, something had happened that made me think I could pull this off. This “something” was a perfect batch. A 100% perfect batch.
A couple of weeks ago, still fresh from last month’s Daring Baker’s challenge, I had decided to tackle the green tea macarons again. You’ll recall that my attempt at these for the challenge hadn’t turned out well at all as far as texture and looks went, but I had really liked the flavour. So I got to work.
However, a friend of mine popped by while I was whisking and folding. We hadn’t seen each other in a long time, and had a lot to talk about. As a result, I lost track of time and ended up leaving my macarons out to dry for much longer than usual. A thick crust had formed on the surface, much thicker than I was used to.
Feeling somewhat worried, I popped the first baking sheet into the oven. Nine minutes later, I was looking at rows of perfectly smooth, pale green shells, with lovely little feet. My negligence had led to a discovery: all this time, I simply hadn’t been letting my macarons dry for long enough.
Unfortunately, I had forgotten that chocolate macarons have a reputation for being the absolute most difficult of all macarons. This has to do with the inclusion of cocoa in the batter: not only does cocoa have to be very carefully sifted, but it can also release oil during the baking process, which results in loss of crispiness. One way to prevent this is to roast the cocoa in the oven. I was aware of all this, but laziness got the best of me (I get lazy at the worst possible times): I didn’t roast the cocoa, and I did a half-assed job of sifting it. The result: lumpy, overly chewy macarons that I didn’t even bother photographing.
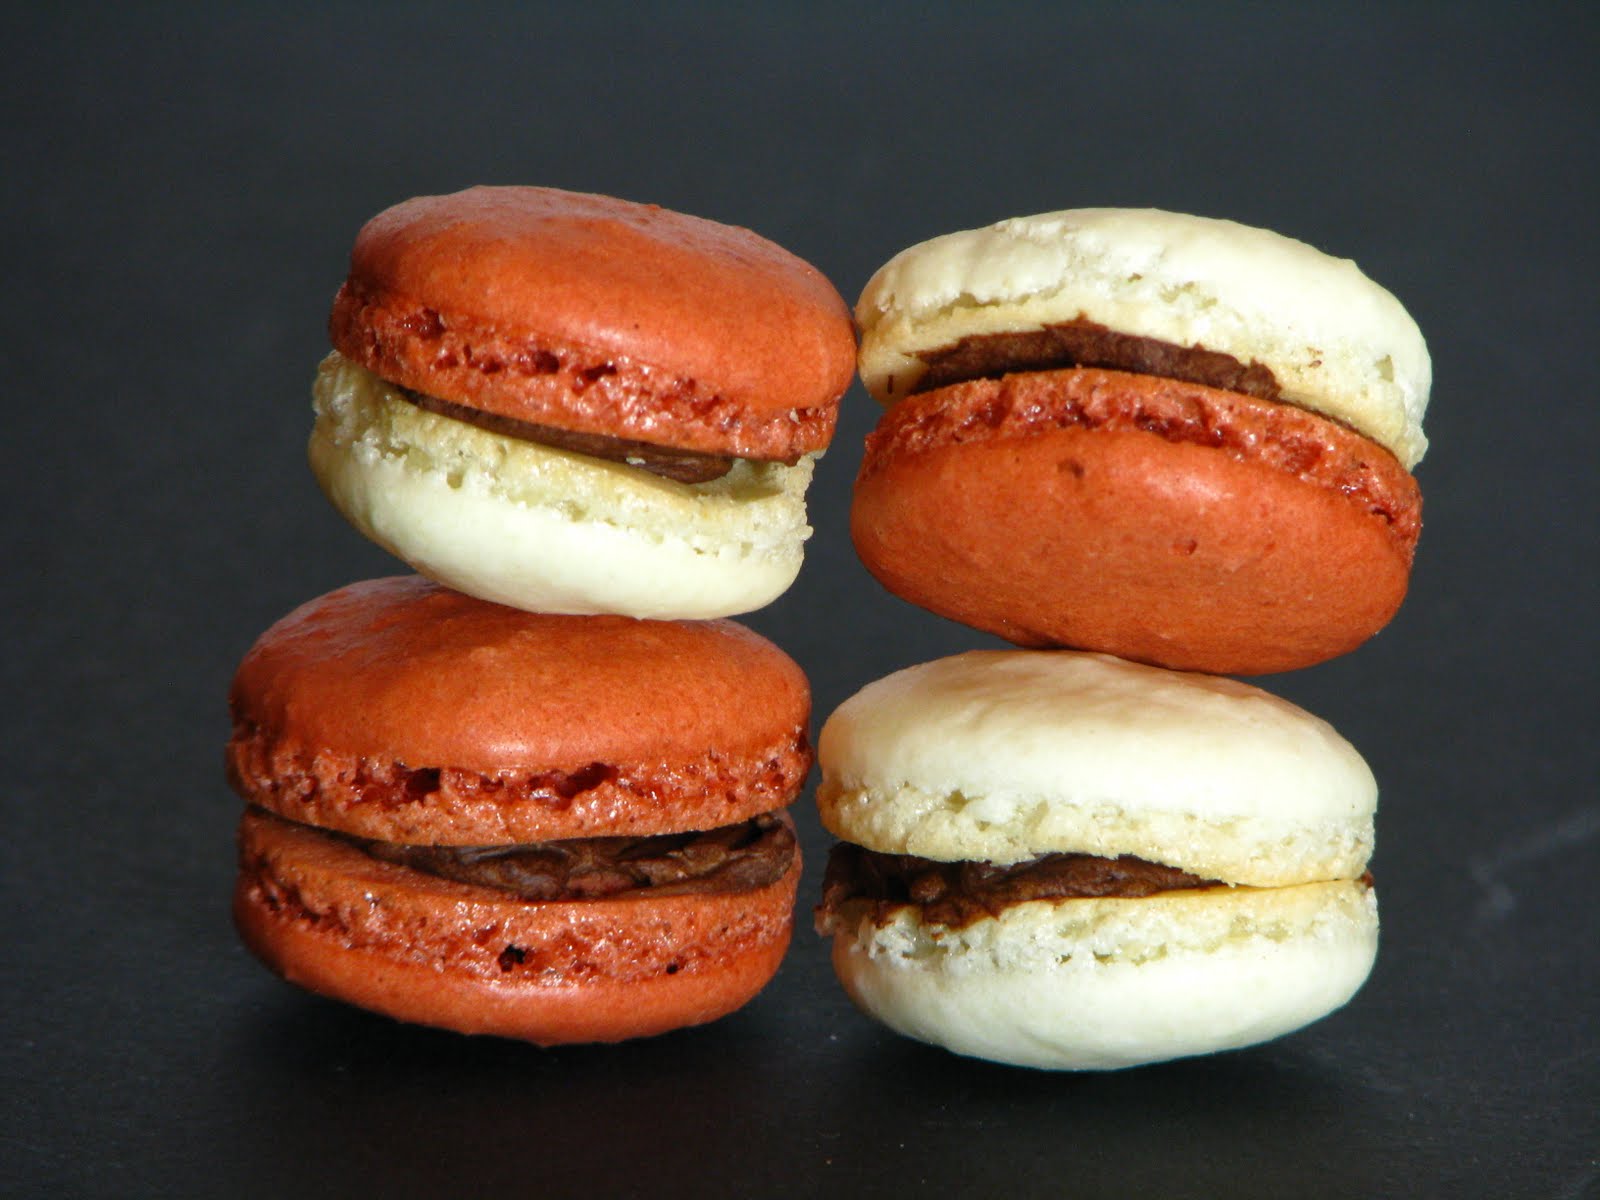
Luckily, my confidence wasn’t so high that I hadn’t given myself room for failure: I still had a couple of days before the conference. This gave me time to make two other batches, this time without any flavouring. I made a plain white batch, and a rose-coloured one (which was initially supposed to be brown, but I went a little overboard with the red colouring). Then I sandwiched them with a simple dark chocolate ganache, and packed them for the conference.
I was one of the speakers at the conference, and gave a presentation related to my PhD research. But to be honest, I got way more comments on my macarons than on my presentation! Most people thought they were storebought. One of our colleagues from France even compared them to the macarons in French pâtisseries – a hell of a compliment, from one who hails from the Land of Macarons!
Barely a week later, I had to make another batch: a friend of Laurent’s was defending his thesis, and they wanted to celebrate afterwards. Being short on both time and chocolate, I opted for an apricot filling. Fruity fillings are always a convenient solution for me, mostly because I rarely (if ever) make my own jam. I’ve done it before, so I know how simple it is – I just don’t enjoy doing it. Whenever I have fresh fruit, I’d rather just eat them as they are, or incorporate them in a dessert, than stew them in sugar. This time, to add a personal touch, I added some cardamom and powdered ginger to the apricot jam, which added a nice kick.
I’ll probably have to make another batch next week, for a meeting with my thesis advisor (my boss, basically): he has recently discovered that I bake, and I fear he will be quite angry if I don’t bring him something very soon… Oh well, any excuse to make macarons is fine by me!
So, it looks like macaron production has shifted into high gear. Having made so many batches in a row, I am much less nervous about making them than I used to be: I no longer stare through the oven glass while they’re baking, anxiously watching for the dreaded cracks or holes. And I know all the measurements for the basic recipe by heart.
However, don’t think my ego will be getting out of hand any time soon. In fact, Laurent has made sure of that, by buying me Pierre Hermé’s wonderful book Macaron. This beauty was recently reprinted. We saw stacks of it in Belgium, last month, but since it’s a heavy hardcover and we were already bringing home kilos of chocolate, I reluctantly put it back on the bookshelf. However, it’s finally made its way here! I have to say, just flipping through this book makes me feel like a total beginner – as I should. Every recipe is a work of art: such creative flavours, fillings and concepts! And I can’t wait to try as many as possible!
Below is the standard recipe I’ve been using for macarons. I’ve posted it before, but it’s a little more precise this time. However, I have always used weights, so my measured quantities may not be as reliable. Also, I am aware that it is recommended to age your egg whites by separating them at least a day ahead, but so far I have always omitted this step, without too dire consequences.
Basic Macaron Recipe
Yields about 50 small macarons (100 individual shells)
110g (3.8 oz, 3/4 cup) almond meal
225g (7.9 oz, 1 5/8 cup) icing sugar
4 egg whites, room temperature
50g (2.75 oz, 1/4 cup) granulated sugar
Food colouring (preferably powdered or gel) (optional)
Line four baking sheets with parchment paper. In a medium bowl, combine the almond meal and icing sugar, then sift them together.
In a large bowl, whisk the egg whites into soft peaks. Gradually add the granulated sugar (about one third at a time), and continue whisking until stiff peaks form. At the end of the process, you should be able to turn your bowl upside down, without having the meringue fall out.
Sprinkle about a third of the sifted almond-sugar mixture over the meringue. Using a flexible spatula, carefully fold the dry ingredients into the meringue, making vertical circular motions. Avoid crushing the egg whites. Remember to scrape the bottom and sides of the bowl from time to time. When the dry ingredients are more or less incorporated (but not completely), add another third of the almond-sugar mixture. Continue until all the dry ingredients have been folded in.
Keep folding until you end up with a smooth, shiny batter, that ribbons off your spatula, but is not too liquid. You want to be able to pipe shells that will not spread too much on your baking sheet. On the other hand, you want the batter to be just liquid enough that any imperfections you wind up with while piping your shells will eventually settle down and vanish.
If you are using food colouring: If using powdered colouring, add it towards the end of the folding process. If you are using gel (or liquid), wait until you have folded in all the dry ingredients, but your batter is still rather gritty, and transfer a couple of spoonfuls of batter into a small bowl. Add the colouring to the small bowl and mix. Return the coloured batter to the large bowl and continue folding. By the time you are finished, the colour should be uniform.
Spoon the batter in a pastry bag fitted with a 1 cm (1/2 inch) round tip, and pipe domes of around 3 cm (1 1/2 inch) in diameter on the prepared baking sheets. Alternately, you can simply use a small spoon: the batter should be liquid enough to slowly drop from the spoon onto the sheet (you can also use a second spoon to gently scrape it off). Try to pipe the domes in staggered rows, and remember to leave enough space for spreading.
When you have filled a baking sheet, bang it firmly on the counter a few times, so as to remove any air bubbles. However, don’t overdo it, or your batter will spread too much, and your shells will be too thin, which increases the risk of crackling.
Let the domes rest at room temperature for about 45 minutes, or as long as it takes for a solid crust to form on the surface (this depends on how humid your kitchen is). You need to be able to touch the domes without having them stick to your finger. In the meantime, preheat your oven to 150°C (300°F).
Bake your macarons, one sheet at a time, for 9-11 minutes, rotating the sheet halfway. Do not let them brown too much on the bottom. When done, immediately remove the parchment paper from the baking sheet (and the macarons with it), and let cool completely.
If you want to sandwich your macarons with a filling, you may do so as soon as they are cool. You can pipe your filling onto the macaron base, or gently spread it (depending on the consistence of your filling). It is recommended to wait until the next day to serve the macarons, as they will be chewier the next day, having absorbed moisture from the filling. Store in the refrigerator, in an airtight container.
Basic Chocolate Ganache
Yields enough to generously garnish 50 macarons
300g (10.5 oz) dark chocolate, chopped
200ml (4/5 cup) heavy cream
Melt the chocolate in a double boiler. Bring the cream to a boil, remove chocolate from heat and pour the cream over the chocolate. Whisk until the mixture is smooth and uniform. Let cool at room temperature, then refrigerate until the ganache is the right consistency (in this case, easily spreadable, but not too liquid).
Garnishing the macarons:
When ready, pipe or gently spread the ganache over the center of a macaron shell, allowing room for spreading, then top with another shell and press gently.
NOTE: If you are using very dark chocolate (chocolate that has a high percentage of cocoa), you may find that your ganache appears a little gritty, and that oil has separated and formed a layer on top of the mixture. You can fix this by whisking in some extra cream (preferably heated, although I’ve made this work with cold cream), one spoonful at a time, until the ganache pulls together again.
Spicy Apricot Filling (Lazy Version)
Yields enough to garnish 50 macarons
125ml (1/2 cup) smooth apricot jam
1 tsp ground cardamom
1/2 tsp powdered ginger
Combine all the ingredients.
Garnishing the macarons:
Spread or spoon the mixture across the center of a macaron shell, allowing room for spreading, then top with another shell and press gently.
Monday, August 24, 2009
Time for a Little Sugar - Dark Chocolate Mousse with Raspberries
Things have been pretty savoury around here, lately. Weird, for a blog called The Chocolate Bunny, don’t you think? Well, it’s true that the recent Asparagus Series didn’t leave much room for sweetness: I can’t think of a dessert that would include asparagus! Then again, I was sceptical about zucchini and chocolate cake in the beginning, then discovered it was marvellous… Still, I think I’ll leave the testing of asparagus with butterscotch to someone braver than me.
Instead, let’s focus on a classic: chocolate mousse.
Last week, Laurent and I had planned to go see Julie & Julia. We knew it was going to be a visually mouth-watering movie, with myriad shots of delicious, decadent food, so we decided to have dinner before seeing it (another wise choice would have been to go out to a nice French restaurant afterwards, but the timing was off).
Unfortunately, I didn’t really have time to make an elaborate meal, since we would have to rush. No boeuf bourguignon, that was for sure. But I still wanted to make something good, or at least something satisfying. After all, who wants to see a gourmet movie on a stomach full of junk food?
I’ll post about the main course some other time, and concentrate on dessert today, as promised. Because that’s really where all my energy went. Not that it took very long to make. Chocolate mousse is so quick to make, and rather difficult to mess up entirely: even if the texture doesn’t come out exactly as planned, it’ll still taste heavenly.
There are as many chocolate mousse recipes as there are cooks. The one I usually make is as basic as they come: just eggs, chocolate, a couple of spoonfuls of sugar, and a little bit of butter (which I sometimes omit entirely). I’ve also made it with cream, for a heavier texture. I’m sure Julia Child’s version includes boatfuls of butter, and I’m sure it tastes divine – but, would you believe it, I don’t own her books. In fact, until quite recently I only had a vague idea of how important Julia Child was to the world of cooking. I simply grew up in a different food culture…
But back to the mousse. Since the preparation itself was simple, I spruced it up by hiding layers of fresh raspberries inside the mousse (which you can sort-of-kind-of make out in the picture). Chocolate and raspberry: my favourite duo. Together, they can make the worst day brighter.
As you can see, this isn’t a very dense mousse, it’s more of a frothy one. Some day, I’ll try adding gelatin, to make it set better. But in the end, I got exactly what I wanted, without much effort: an intensely chocolaty dessert that was both rich and light. It certainly put us in the right mood for Julie & Julia.
As for the movie itself, we both loved it. The parts revolving around Julia’s life were so uplifting! And as for the part concerning Julie Powell, I enjoyed it as well, but I had to wonder: would anyone not involved in the food blogosphere really relate to it? I mean, I haven’t had this blog for all that long, and I’m not sure even I would have related to that aspect of the movie before I started The Chocolate Bunny. Much of the pleasure I found in watching Julie Powell’s story lied in the depiction of the neuroses that come with having a food blog (and I’m sure all of you related to those very same scenes). I wouldn’t have appreciated those moments before, and I’m wondering if anyone else would.
But, no matter. We loved the film, and I had dreams of butter and chocolate for several nights afterwards. Thank God for chocolate mousse.
Quickie Frothy Dark Chocolate Mousse with Raspberries
Slightly modified from Mario Cattoor’s Cuisiner à la flamande
Serves 2-3
50g (2 oz) dark chocolate, chopped
2 eggs, separated
25g (1 oz, 1/8 cup) sugar
1 tbsp butter
Fresh whole raspberries
Mint leaves, for decorating
Melt the chocolate with the butter in a double boiler over low-medium heat. Let cool slightly.
In a large bowl, beat the egg yolks with the sugar until the mixture is pale yellow and thick. Stir in the cooled chocolate mixture.
Beat the egg whites until very stiff (you should be able to hold your bowl upside-down without having them fall out). Using a flexible rubber spatula, gently incorporate them into the chocolate mixture, being careful not to crush them.
Take the individual recipients in which you want to serve your mousse, and place a couple of raspberries on the bottom (depending on size of your recipient). Cover with a layer of mousse, then gently place a few more raspberries over that. Repeat the process until your recipients are full and/or all the mousse has been used.
Cover and refrigerate the portions for at least 2 hours. Before serving, top with a sprig of mint and a raspberry. Serve chilled.
Thursday, July 23, 2009
Yummy Resources - Blueberry and Apricot Almond Tart
I wouldn’t really call myself a sucker for a bargain. I do try to favour items that are on sale, but I won’t go as far as to buy something I don’t really need or particularly like, just because it’s half-price (unlike one of my relatives, who has been known to buy unnecessary things in bulk for that very reason).
Food, however, is a little different. Not that I would ever buy something I don’t enjoy eating. But if it’s on sale, I might buy a little more than I need – because, I figure, food is rarely wasted around here.
And that’s how I ended up with five packages of blueberries. At “5 for 5 dollars”, I just couldn’t resist.
I’ll admit it was a little overboard, and I’m having trouble finishing them off. I nibble a few with my breakfast, try to sneak some into my lunch, but the stack of berries doesn’t seem to be diminishing much. Laurent isn’t helping me at all, because he’s busy eating cherries, these days. I would also like some cherries, but unfortunately I have five packages of blueberries to finish.
So, I decided to do something a little more proactive. It’ll take a few projects to really finish off these berries, but at least this one has put a nice dent into them. It’s a recipe I took from Louis-François Marcotte’s Simple et Chic, a lovely little book I got for Christmas and haven’t used nearly enough yet.
This Almond and Berries Tart is in many ways similar to the Bakewell Tart we had to make for the last Daring Bakers’ Challenge. In fact, I used the shortcrust pastry recipe we were given for that challenge, because it comes together so beautifully (the recipe in the book had a weird flour/butter ratio, and I had a feeling it would come out hard). The almond cream filling is made slightly differently, and is less puffy and cake-like than the Bakewell version, but the underlying principle appears to be the same.
The book’s recipe called for blueberries and raspberries, but I substituted fresh apricot for the latter. Yes, on top of the mountain of blueberries, I also had a bag of apricots to finish – I couldn’t help myself, they smelled so good in the market stalls! And apricot is always a good match with almond flavours.
I also played around with the almond filling. The book asked for 2 cups of whole almonds to be ground, but I only had almond meal on hand. I estimated that 2 cups of whole almonds would probably yield 1 cup of powder, which in retrospect was probably a little too much (this is why cookbooks should always incorporate weight equivalents!). On top of that, I added a little more, to compensate for the fact that I had put in less sugar than indicated.
So, really, I tweaked a lot of things. Often, when I improvise too much, disaster is in the air, but this time, it honestly came out quite delicious! It was not too sweet, the flavours went well together, and the ultra-moist texture was delightful. Laurent is usually not too happy when I make big tarts or cakes: since it’s just the two of us, it takes us a long time to finish them off, and he gets tired of them. So we usually give away a large portion of the desserts. But in this case, he seemed more than happy to keep most of the tart for the rest of the week (although we still gave a lot of it away).
Only four packages of blueberries to go!
Blueberry and Apricot Almond Tart
Adapted from Simple et Chic
Makes one 23 cm (9 inch) tart, serves about 8
For the sweet shortcrust pastry:
225g (8oz) all purpose flour
30g (1oz) sugar
1/2 tsp salt
110g (1/2 cup) unsalted butter, cold and diced
2 egg yolks
1/2 tsp almond extract
1-2 tbsp cold water (or more if needed)
For the filling:
175g (6 oz) almond flour
190g (7 oz) sugar
150g (5 oz) unsalted butter, softened and diced
2 whole eggs
2 tbsp amaretto (almond liqueur)
1 tsp vanilla extract
250ml (1 cup) fresh blueberries
3 apricots, pitted and diced
To make the pastry:
Sift together the flour, sugar and salt. Add in the diced cold butter. Working quickly, use your fingertips to rub the butter into the flour, until the mixture resembles bread crumbs. Lightly beat the egg yolks with the almond extract and incorporate them into the flour mixture. Add in the water slowly, putting just enough to obtain a dough that holds together, but is not sticky. Form dough into a disc, cover tightly and refrigerate for at least one hour.
When ready to use, roll out the dough on a floured surface, about 2-3 mm (1/8 inch) thick. Line a 23 cm (9 inch) tart pan with the dough, fold the excess dough over the sides of the pan and pinch all around to secure. Prick the bottom of the pan with a fork, repeatedly. Refrigerate for at least 15 minutes.
To make the filling:
In a large bowl, combine the almond flour and the sugar. Add in the softened butter and cream until smooth. Incorporate the eggs, amaretto and vanilla and continue mixing until the mixture is homogenous.
To assemble and bake the tart:
Preheat the oven to 190ºC (375ºF).
Spoon half the almond filling into the prepared tart pan, then evenly sprinkle with half the blueberries and apricot. Cover with the remainder of the filling and scatter the remaining fruit on top of that. Gently press the fruit halfway into the filling with your fingers.
Bake in the preheated oven for 20 minutes. Then reduce heat to 180ºC (350ºF) and continue baking another 30 minutes, until the top of the tart is golden brown. The center will still be quite soft, and a little jiggly.
Serve at room temperature, or cold. Refrigerate the leftovers.
Saturday, June 27, 2009
Daring Bakers' June Challenge: Bakewell Tart... er... Pudding
225g (8oz) all purpose flour
125g (4.5oz) ground almonds
200ml (3/4 cup) lemon juice (4-6 large lemons)
200g (1 1/4 cup) icing sugar
125g (2/3 cup) unsalted butter, diced
Wednesday, May 27, 2009
Daring Bakers' May Challenge - Apple Strudel
Two smaller strudels from one batch of dough
Although we were given a recipe for classic apple strudel (which you can find at The Daring Kitchen), we were encouraged to play around with the filling. The only requirement was to make the strudel dough ourselves. The ingredients themselves are very simple: flour, water, oil, and vinegar. The main difficulty lied in stretching the dough until it was tissue-thing. The technique consisted in rolling out the dough as much as possible on a tablecloth rubbed with flour (or, as I did, floured waxed paper taped to the table), then picking it up and stretching it with the help of gravity.
Most people seem to have found the dough a dream to work with, reporting that it stretched almost by itself. My experience was a little rockier... My first attempt at making the dough led to a sticky mess that was too wet and completely impossible to knead; I threw it out immediately. For my second attempt, I was too cautious about adding liquid, and so I ended up with a dough that was too dry and rather difficult to stretch: gravity wasn't enough, so I had to lay the dough flat on the table and pull it. Even with this method, I had some trouble, as the dough tended to shrink back, like pizza dough. I managed it in the end, but my back was killing me by the time I was through.
A couple of days ago, I made a third, final attempt. I had a better idea of what the dough was supposed to be like, and was less shy about adding water and kneading. The result was much better, and I finally understood what other people meant about the dough being easy to work with - as long as it's made right. Unfortunately, I made the mistake of not flouring my work surface, thinking the dough wouldn't stick - which, of course, it did, leaving me to desperately try to pry it from the waxed paper without tearing it, while shrieking for Laurent to get me some flour, STAT! Despite that little mishap, the rest of the process went very well, although I still used the same unorthodox stretching technique. It worked, though: my dough was much thinner than the first time, while remaining solid enough to hold all the filling in.
Speaking of the filling... My first strudel was a savoury one, with Italian-inspired ingredients: mild Italian sausage, portobello mushrooms, red bell peppers, and grated mozzarella. It made a really good dinner! For my second batch, I cut the stretched dough in half lengthwise and made two sweet versions: one following the classic apple recipe we were given, and one with an improvised combination of pear, chocolate, and almond slivers. The apple strudel was delicious, and honestly rivaled the ones I've had in Vienna. However, I used very fresh Royal Gala apples, which didn't look like they would soften enough during the baking process, so I cooked them in butter aforehand - which turned out to be a wise decision. The pear strudel was kind of unbalanced (you can see all the chocolate ended up on one side of the pastry), but pear and chocolate are always a great combination, and I will get it right next time.
Because there will definitely be a next time. Even though this recipe looks complicated at first glance, it's really quite simple once you get the hang of it. And, as you can see, it's also very versatile, good for dinner or dessert. As for the pastry, it's uniquely light and flaky once it's baked. The only downside is that it tends to get soggy rather quickly, so it's best to eat the whole thing within a day or two.
I'm curious as to what else I could do with strudel dough... Maybe use several sheets to make a pie? Or how about mini-strudels, as an appetizer? Oh, the possibilities!
As I said, the original recipe and instructions can be found at The Daring Kitchen. Below is what I ended up doing, for better or for worse.
Strudel Dough
Makes one large strudel or two smaller ones, serves about 6 people
200g (1 1/3 cups) unbleached flour
1/8 tsp salt
105ml (7 tbsp) water, plus more if needed
30ml (2 tbsp) vegetable oil, plus additional for coating the dough
1/2 tsp cider vinegar
115g (1/2 cup, or 9 tbsp) butter, melted
1240ml (1 cup) fresh breadcrumbs
Combine flour and salt in a mixing bowl. Combine the water, flour, and vinegar in a measuring cup and gradually add it to the flour, stirring with a wooden spoon until you get a soft dough that's not sticky, but not too dry either: it needs to remain very supple.
Take the dough out of the bowl and knead it on an unfloured work surface for about 7 minutes. Pick it up and throw it down hard onto your working surface every now and then.
Put the dough on a plate, oil the top lightly, and cover tightly with plastic wrap. Let rest for 30-90 minutes (the longer the better).
Meanwhile, heat 3 tbsp of the melted butter in a skillet, add the breadcrumbs and cook until they are brown and toasted. Let cool completely. Prepare your filling (see below).
When your dough has rested long enough, put your oven rack in the upper third of the oven and preheat to 200°C (400°F). Line a baking sheet with parchment paper.
Cover a large work surface with waxed paper and tape it securely. Flour lightly. Turn out the dough on the surface and roll it in a rectangle, as flat as you can. Then, stretch the dough any way you can. Ideally, pick it up by one end and let gravity do the work, supporting the dough with the backs of your hands and your forearms as needed. Or, do what I did and pull around randomly, keeping the dough on the surface. The dough is ideally supposed to stretch until 90cm x 60cm (3 x 2 feet), but I never got it to that length. What's important is for the dough to be very thin, see-through in fact. Don't panic if you get a few holes. When you are done, the edges will likely be thicker; cut them out with scissors. If you want to make two smaller strudels, cut the dough lengthwise in half.
Using a silicone pastry brush (or your fingers), spread another 3 tbsp of melted butter over the entire surface of the dough, then cover with the breadcrumbs (this helps keep the layers separate after the strudel is rolled, and keeps the pastry flaky). Spread your filling about 10cm (4 inches) away from the short edge of the dough, in a strip about 15 cm wide (6 inches). Fold the short end of the dough over the filling, then roll the strudel, either with your bare hands, or by lifting the waxed paper and letting the strudel roll onto itself. Tuck the side edges under the roll. Brush the top of the strudel with the remaining butter.
Spreading the filling on the prepared dough
Curve the strudel into a horseshoe form if necessary (mine was small enough to be left straight), then pick it up and place it on the prepared baking sheet. Bake in the preheated oven for 30 minutes, or until the pastry is deep golden brown (the smaller strudels bake more quickly). If making a dessert strudel, let cool at least 30 minutes before serving (savoury strudels can be eaten hot). Cut into slices with a serrated knife.
Fills a large strudel
1 tbsp olive oil
Savoury sausage strudel
Remove the ground meat from the sausage bowels. Cook in a skillet over medium heat, until browned and completely cooked. Remove from heat and reserve.
Remove the stems from the mushrooms. Cut the mushrooms into slices and cook them in a skillet over high heat, without adding any oil or butter. Salt, turn once, and continue cooking until the mushrooms are beginning to shrivel and brown (dry-cooking them like this allows them to release some of their moisture, and brings out their flavour). Transfer to a bowl and reserve.
Core the bell pepper and cut it into strips, julienne-style. Mince the onion. Heat the olive oil in a pan over medium-high heat, cook the onion and pepper strips until tender. Season with oregano (do not salt, as the sausage meat is very salty). Remove from heat and reserve.
When ready, spread the ingredients in layers over the prepared strudel dough as indicated above (don't forget to top with the mozzarella). Roll, butter, and bake as indicated. Serve hot.
Classic Apple Filling
Fills a half-strudel
1 tbsp rum
2 tbsp raisins
1/4 teaspoon ground cinnamon
35g (1/6 cup) sugar
2 tbsp butter
120ml (1/2 cup) coarsely chopped walnuts
2 medium tart apples
Confectioners' sugar for dusting
Apple strudel
Mix the rum and raisins in a large bowl. Mix the cinnamon and sugar in a smaller bowl.
Core and peel the apples, cut them into 5 mm (1/4 inch) slices. Melt the butter in a skillet over medium heat and cook the apples until they are slightly tender. Mix them with the raisins and rum, then add the cinnamon sugar and mix until the apples are coated.
Spread the walnuts and apple mixture over the prepared strudel dough as indicated. Roll, butter, and bake as indicated. Sprinkle with confectioners' sugar when baked. Let cool and serve warm or at room temperature.
Pear and Chocolate Filling
Fills a half-strudel
2 medium ripe pears
60 ml (1/4 cup) dark chocolate discs or chips
the juice of a lemon
3 tbsp light brown sugar
60 ml (1/4 cup) slivered almonds
Confectioners' sugar for dusting
Core and peel the pears and cut them into 5 mm (1/4 inch) slices. Douse them with the lemon juice.
Spread the filling in layers over the strudel as indicated above: first the almonds, then the chocolate, and finally the pears. Sprinkle the sugar over the pears. Roll, butter, and bake as indicated. Sprinkle with confectioners' sugar when baked. Let cool and serve warm or at room temperature. (Note: Don't refrigerate this strudel later, as the chocolate will harden again - it might have been a better idea to use a ganache... I'll try it sometime and report back.)
Pear and chocolate strudel